

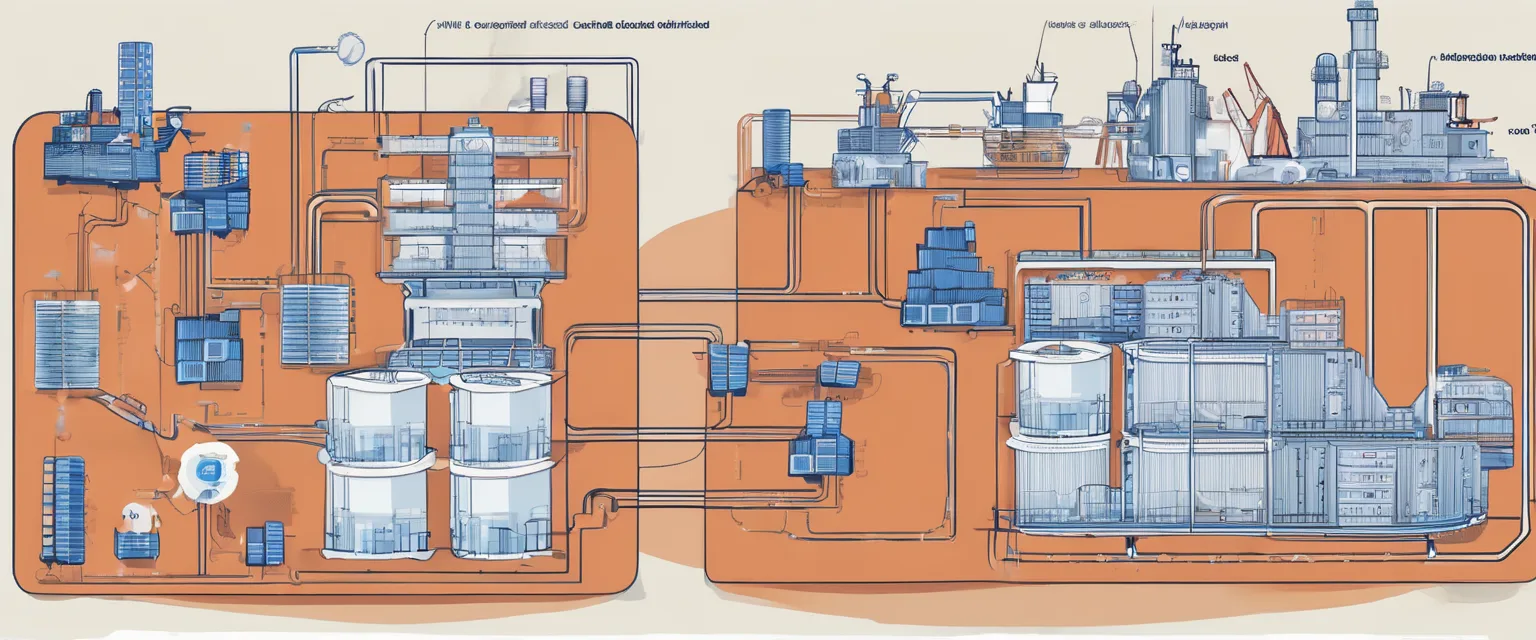
Introduction: What you’ll build or accomplish
You will take a containerized application that runs locally on Docker Desktop (often with Docker Compose) and migrate it to a real production hosting provider—without rewriting your app. Follow this playbook to:
- Develop locally with
docker composeand production-like settings - Harden and shrink images using multi-stage builds
- Externalize configuration (secrets, environment variables, volumes)
- Choose a production target (VPS, PaaS, or Kubernetes)
- Deploy safely with repeatable commands and a rollback plan
- Verify the production deployment with health checks and tests
This guide is intentionally imperative: do this, then do that, and check specific outputs after each key step.
Prerequisites: Required tools, knowledge, or setup
Tools
- Docker Desktop installed locally (Windows/macOS/Linux) with Docker Compose v2 (
docker compose) - Git
- A container registry account: Docker Hub, GitHub Container Registry (GHCR), or a cloud registry (ECR/GCR/ACR)
- One production target (pick one):
- VPS (recommended for a first production move): Ubuntu 22.04/24.04 host with SSH access
- PaaS (Render/Fly.io/Railway): deploy Docker images with minimal ops
- Managed Kubernetes (EKS/GKE/AKS): for scaling and multi-service orchestration
Knowledge
- Basic CLI use (terminal/PowerShell)
- Basic networking concepts (ports, DNS)
- Basic Docker concepts (images vs containers, volumes)
Example app structure used in this playbook
Even if your app differs, follow the same patterns.
myapp/
  app/
    ... source code ...
  Dockerfile
  compose.yml
  compose.prod.yml
  .env.example
  .gitignore
Step 1: Make your local setup production-like (without leaving Docker Desktop)
Why this step matters: most production failures happen because “it worked on my machine” setups differ from real hosting: different environment variables, different ports, missing volumes, and permissive dev defaults. You will reduce those differences now.
1.1 Create a clean compose.yml for local development
Do this so local dev remains fast, but structured enough to mirror production services.
services:
  web:
    build:
      context: .
      dockerfile: Dockerfile
      target: dev
    ports:
      - "8080:8080"
    environment:
      - NODE_ENV=development
    volumes:
      - ./:/usr/src/app
    depends_on:
      - db

  db:
    image: postgres:16
    environment:
      - POSTGRES_USER=myapp
      - POSTGRES_PASSWORD=myapp_password
      - POSTGRES_DB=myapp
    volumes:
      - db_data:/var/lib/postgresql/data
    ports:
      - "5432:5432"

volumes:
  db_data:
1.2 Run it locally and confirm expected output
docker compose up --buildExpected result:
- You see logs for
webanddb - Your app responds on
http://localhost:8080 - Postgres initializes and creates the database
Screenshot description (helpful for documentation): Docker Desktop shows two running containers under your project, with web exposing port 8080 and db exposing 5432.
1.3 Add health checks (so production knows when a container is actually ready)
Why this step matters: “container is running” does not mean “service is ready.” Health checks reduce race conditions and allow safer rolling updates.
Add this to web and db:
services:
  web:
    # ...
    healthcheck:
      test: ["CMD", "curl", "-fsS", "http://localhost:8080/health"]
      interval: 10s
      timeout: 3s
      retries: 10

  db:
    # ...
    healthcheck:
      test: ["CMD-SHELL", "pg_isready -U myapp -d myapp"]
      interval: 10s
      timeout: 5s
      retries: 10
Expected result: docker compose ps eventually shows (healthy) for both services.
Step 2: Fix configuration management (env vars, secrets, and parity)
Why this step matters: production deployments fail when secrets are baked into images, stored in Git, or inconsistent across environments. You will standardize configuration so the same container image can run anywhere.
2.1 Create an .env.example and keep real secrets out of Git
# .env.example
DATABASE_URL=postgresql://myapp:myapp_password@db:5432/myapp
APP_PORT=8080
APP_ENV=development
Add .env to .gitignore:
# .gitignore
.env
Expected result: developers copy .env.example to .env locally, but your repository never contains real credentials.
2.2 Wire Compose to use env vars
Update compose.yml:
services:
  web:
    # ...
    env_file:
      - .env
    environment:
      - APP_PORT=${APP_PORT}
      - APP_ENV=${APP_ENV}
      - DATABASE_URL=${DATABASE_URL}
Step 3: Build a production-grade image (smaller, safer, repeatable)
Why this step matters: dev images often include build tools, full dependency trees, and hot-reload volumes. In production, you want minimal size, fewer CVEs, and deterministic builds.
3.1 Use a multi-stage Dockerfile with separate dev and prod targets
Here’s an example for a Node.js app. Adapt the pattern for Python/Go/Java.
# Dockerfile

# --- Base dependencies (shared) ---
FROM node:20-slim AS base
WORKDIR /usr/src/app

# --- Dev target (fast iteration) ---
FROM base AS dev
COPY package*.json ./
RUN npm ci
COPY . .
EXPOSE 8080
CMD ["npm", "run", "dev"]

# --- Build target (compile assets, etc.) ---
FROM base AS build
COPY package*.json ./
RUN npm ci
COPY . .
RUN npm run build

# --- Prod runtime (minimal) ---
FROM node:20-slim AS prod
WORKDIR /usr/src/app
ENV NODE_ENV=production

# Copy only what you need at runtime
COPY package*.json ./
RUN npm ci --omit=dev
COPY --from=build /usr/src/app/dist ./dist

# Create non-root user (recommended)
RUN useradd -m appuser && chown -R appuser:appuser /usr/src/app
USER appuser

EXPOSE 8080
CMD ["node", "dist/server.js"]
3.2 Build and run the production image locally
docker build -t myapp:prod --target prod .
docker run --rm -p 8080:8080 --env-file .env myapp:prod
Expected result: your app runs without mounting your source code volume. This is critical: if it only works with bind mounts, it’s not ready for production.
3.3 Warning: don’t rely on latest tags in production
Why: latest is mutable. Use versioned tags to support rollback.
Step 4: Create production Compose overrides (ports, restart policy, no dev volumes)
Why this step matters: production needs stability (restart policies), correct port exposure, and persistent data volumes. You also want to remove dev-only behavior like live-reload volumes.
4.1 Create compose.prod.yml
services:
  web:
    image: myregistry.example.com/myapp/web:1.0.0
    restart: unless-stopped
    environment:
      - NODE_ENV=production
    ports:
      - "80:8080"
    # No bind mounts in production

  db:
    image: postgres:16
    restart: unless-stopped
    volumes:
      - db_data:/var/lib/postgresql/data

volumes:
  db_data:
4.2 Validate your Compose config before deploying
docker compose -f compose.yml -f compose.prod.yml configExpected result: a fully rendered YAML prints to the terminal. If you see missing variables, fix your env management before continuing.
Step 5: Choose a migration method (and pick the right hosting type)
Why this step matters: “production hosting” can mean a single VPS, a PaaS, or Kubernetes. Your choice changes the deployment mechanics, networking, scaling, and operational burden.
5.1 Decide where you’re deploying
- VPS (Docker Engine + Compose): best for small teams and straightforward apps. You control the machine. You must handle OS patching, firewall, backups.
- PaaS (Render/Fly.io/Railway): best when you want minimal ops. You trade some control for speed.
- Managed Kubernetes: best for scale, multi-service platforms, and advanced rollout strategies. More complex.
5.2 Pick your migration transport: Registry-based vs export
- Registry-based (recommended): push images to a registry, pull them in production. This supports CI/CD and multi-host deployments.
- Export-based (save/load): good for air-gapped or one-off moves. Harder to automate.
Step 6: Push your images to a registry (repeatable production delivery)
Why this step matters: production hosts should not build from your laptop. They should pull a known, versioned artifact from a registry to ensure consistency and auditing.
6.1 Log in to your registry
Docker Hub example:
docker loginGHCR example:
echo "$GITHUB_TOKEN" | docker login ghcr.io -u YOUR_GITHUB_USER --password-stdin6.2 Tag and push a versioned image
# Replace with your registry/repo
REGISTRY=ghcr.io/your-org
APP=web
VERSION=1.0.0

docker build -t ${REGISTRY}/myapp/${APP}:${VERSION} --target prod .
docker push ${REGISTRY}/myapp/${APP}:${VERSION}
Expected result: push completes and you can see the image in your registry UI.
6.3 Common error: “denied: permission denied”
Fix it by doing this:
- Confirm you’re logged into the correct registry host (e.g.,
ghcr.io) - Confirm repo/package permissions allow pushing
- Ensure the tag includes the correct namespace (org/user)
Step 7: Provision a production host (VPS path) and install Docker Engine
Why this step matters: Docker Desktop is a development environment. Production should run on Docker Engine (or a compatible runtime) on a server you can secure, monitor, and back up.
7.1 Create a VPS and SSH into it
ssh ubuntu@YOUR_SERVER_IPExpected result: you land on the remote shell and can run uname -a.
7.2 Install Docker Engine and Compose plugin (Ubuntu)
Warning: only run commands you understand as root. Package installation changes your system.
sudo apt-get update
sudo apt-get install -y ca-certificates curl gnupg

sudo install -m 0755 -d /etc/apt/keyrings
curl -fsSL https://download.docker.com/linux/ubuntu/gpg | sudo gpg --dearmor -o /etc/apt/keyrings/docker.gpg
sudo chmod a+r /etc/apt/keyrings/docker.gpg

echo \
  "deb [arch=$(dpkg --print-architecture) signed-by=/etc/apt/keyrings/docker.gpg] https://download.docker.com/linux/ubuntu \
  $(. /etc/os-release && echo \"$VERSION_CODENAME\") stable" | \
  sudo tee /etc/apt/sources.list.d/docker.list > /dev/null

sudo apt-get update
sudo apt-get install -y docker-ce docker-ce-cli containerd.io docker-buildx-plugin docker-compose-plugin
7.3 Allow your user to run Docker without sudo (optional)
Warning: Docker group effectively grants root-equivalent privileges. Do this only for trusted users.
sudo usermod -aG docker $USER
newgrp docker
docker version
Expected result: docker version prints client and server info without sudo.
Step 8: Deploy to the VPS with Compose (production runbook)
Why this step matters: you need a repeatable deployment procedure. “SSH in and run random commands” is how outages happen.
8.1 Create an app directory on the server
mkdir -p ~/apps/myapp
cd ~/apps/myapp
8.2 Copy Compose files to the server
From your local machine:
scp compose.yml compose.prod.yml ubuntu@YOUR_SERVER_IP:~/apps/myapp/8.3 Create a production .env on the server
Warning: do not copy your local .env blindly. Production secrets must be unique.
cd ~/apps/myapp
nano .env
Example .env for production:
APP_PORT=8080
APP_ENV=production
DATABASE_URL=postgresql://myapp:CHANGE_ME@db:5432/myapp
8.4 Pull images and start services
docker login ghcr.io

docker compose -f compose.yml -f compose.prod.yml pull
docker compose -f compose.yml -f compose.prod.yml up -d
Expected result:
docker compose psshows servicesUpcurl -i http://YOUR_SERVER_IP/healthreturns200(or your expected status)
8.5 Expected output checks
docker compose -f compose.yml -f compose.prod.yml ps
docker compose -f compose.yml -f compose.prod.yml logs --tail=100 web
Expected result: no crash loops; health checks become healthy after a short warm-up.
Step 9: Add a reverse proxy + TLS (so production isn’t “IP:port”)
Why this step matters: production traffic should use HTTPS with a real domain. A reverse proxy (Nginx/Caddy/Traefik) terminates TLS, routes requests, and enables safer headers and rate limits.
9.1 Use Caddy for simple HTTPS
Add a caddy service to compose.prod.yml (or a new proxy compose file):
services:
  caddy:
    image: caddy:2
    restart: unless-stopped
    ports:
      - "80:80"
      - "443:443"
    volumes:
      - ./Caddyfile:/etc/caddy/Caddyfile:ro
      - caddy_data:/data
      - caddy_config:/config

volumes:
  caddy_data:
  caddy_config:
Create Caddyfile:
yourdomain.com {
  reverse_proxy web:8080
}
9.2 Point DNS to your server
- Create an
Arecord foryourdomain.comtoYOUR_SERVER_IP
Expected result: after DNS propagates, Caddy automatically issues TLS certificates and serves HTTPS.
9.3 Start/restart with proxy
docker compose -f compose.yml -f compose.prod.yml up -dExpected result:
https://yourdomain.comloads successfullycurl -I https://yourdomain.comshowsHTTP/2 200orHTTP/1.1 200
Step 10: Set up data persistence and backups (don’t lose production data)
Why this step matters: containers are ephemeral. Your database and uploads must be persisted and backed up, or a redeploy can destroy data.
10.1 Confirm volumes exist
docker volume lsExpected result: you see a volume like myapp_db_data (Compose prefixes it).
10.2 Backup Postgres safely
Warning: do not blindly tar /var/lib/docker on a live database as your only strategy. Prefer logical backups (pg_dump) or coordinated snapshots.
Run a logical backup:
docker compose -f compose.yml -f compose.prod.yml exec -T db \
  pg_dump -U myapp myapp > backup.sql
Expected result: a backup.sql file appears on the server in your current directory.
10.3 Common error: authentication failures
If pg_dump fails, do this:
- Confirm
POSTGRES_USERand password match what the DB container was initialized with - If you changed credentials after the first run, recreate the DB or update users inside Postgres
Step 11: Implement a safe release workflow (versioned deploys + rollback)
Why this step matters: “overwrite and pray” is not a release strategy. Version tags let you roll back quickly.
11.1 Release a new version
- Build and push
1.0.1to your registry - Update
compose.prod.ymlto reference:1.0.1
# On your local machine
VERSION=1.0.1
docker build -t ${REGISTRY}/myapp/web:${VERSION} --target prod .
docker push ${REGISTRY}/myapp/web:${VERSION}
11.2 Deploy on the server
cd ~/apps/myapp

docker compose -f compose.yml -f compose.prod.yml pull
docker compose -f compose.yml -f compose.prod.yml up -d
Expected result: containers recreate with the new image digest. Verify with:
docker compose -f compose.yml -f compose.prod.yml images11.3 Roll back if needed
Do this if health checks fail or error rates spike:
- Edit
compose.prod.ymlto the previous tag (e.g.,1.0.0) - Redeploy
docker compose -f compose.yml -f compose.prod.yml up -dTroubleshooting: Common issues and solutions
Issue 1: “Works locally, fails on server”
- Cause: your local run uses bind mounts (
./:/app) that mask missing files in the image. - Fix: run the production image locally with
docker runand no volumes. Ensure required files are copied in the Dockerfile.
Issue 2: Port conflicts (e.g., bind: address already in use)
- Cause: another service is already listening on port 80/443/8080.
- Fix: run
sudo ss -tulpnon the server, then change Compose port mappings or stop the conflicting service.
Issue 3: Container crashes in a loop
- Cause: missing env vars, DB migrations not run, or app exits on startup error.
- Fix: inspect logs and run a one-off container to debug.
docker compose -f compose.yml -f compose.prod.yml logs --tail=200 web
docker compose -f compose.yml -f compose.prod.yml run --rm web sh
Issue 4: Database connection fails from web container
- Cause: using
localhostinDATABASE_URL. Inside containers,localhostmeans “this container,” not the DB. - Fix: use the Compose service name (
db) as the host:postgresql://user:pass@db:5432/dbname.
Issue 5: Permission problems with mounted volumes
- Cause: non-root user in container cannot write to volume paths.
- Fix: align UID/GID, chown the target directory, or adjust the image to create writable directories at build time.
Testing: How to verify it works (before you call it “production”)
Do these checks after every deployment.
1) Verify containers are running and healthy
docker compose -f compose.yml -f compose.prod.yml psExpected result: all services Up, ideally with healthy status.
2) Verify HTTP health endpoint
curl -fsS http://YOUR_SERVER_IP/health && echo "OK"Expected result: prints OK.
3) Verify HTTPS (if using a domain)
curl -I https://yourdomain.comExpected result: 200, plus TLS-related headers.
4) Verify database connectivity from inside the web container
docker compose -f compose.yml -f compose.prod.yml exec web sh -lc "printenv DATABASE_URL"Expected result: shows the production DB URL using host db (or your managed DB hostname).
5) Run a basic smoke test flow
- Create a record (user/order/item)
- Restart containers
- Confirm the record persists (validates volumes and DB)
docker compose -f compose.yml -f compose.prod.yml restart
Next Steps: Ways to extend or improve
1) Add CI/CD to build and push images automatically
Do this so production artifacts are created consistently. A typical path:
- GitHub Actions builds on every tag
- Pushes image to GHCR
- Server pulls and redeploys (or you use a deployment agent)
2) Move the database to a managed service
Do this to reduce operational risk. Managed Postgres typically provides automated backups, replication, and easier upgrades. Update DATABASE_URL to point to the managed endpoint and remove the DB container from production Compose.
3) Add observability (metrics + logs)
- Export metrics to Prometheus
- Build dashboards in Grafana
- Centralize logs (Loki/ELK)
4) Consider orchestrators when you outgrow a single host
- Docker Swarm/Portainer: simpler clustering for small teams
- Kubernetes: strongest ecosystem for scale and multi-tenant environments
- Rootless runtimes (Podman/Buildah): stronger security posture in some enterprise environments
Conclusion: Summary and additional resources
You now have a concrete, testable path from Docker Desktop development to production hosting:
- Standardize local dev with Compose and health checks
- Build a production image that runs without bind mounts
- Externalize config and tag images for versioned releases
- Push to a registry, pull on the server, and deploy with Compose
- Front with HTTPS, persist data with volumes, and validate via smoke tests
To go further, implement CI/CD, move stateful services to managed offerings, and add monitoring so you can detect issues before users do.